
Getting braces is a major step toward achieving a healthy and confident smile. One essential part of the process is taking dental impressions. These impressions allow your orthodontist to create a precise model of your teeth and gums, which guides the design and fitting of braces. Understanding how long impressions take and what the process involves can help reduce anxiety, especially for patients with sensitive teeth or concerns about gum disease.
What Are Dental Impressions?
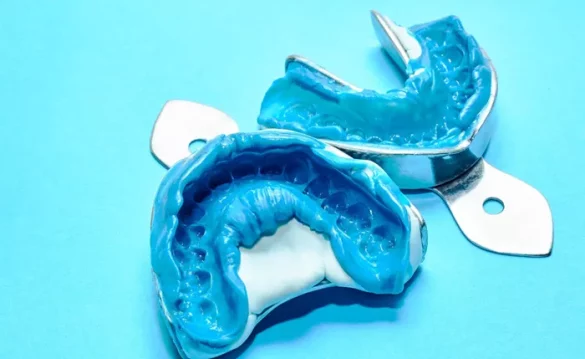
Dental impressions are molds of your teeth and surrounding oral structures. They capture every detail of your teeth’s position, bite, and shape. Orthodontists use these molds to plan treatment accurately. The impressions can be taken using traditional materials or digital scanning technology.
Traditional Impressions
Traditional impressions involve placing a soft, moldable material in a tray and pressing it against your teeth. The material hardens in a few minutes to form a negative imprint. Common materials include alginate and polyvinyl siloxane. These materials are safe, non-toxic, and widely used in orthodontics.
Digital Impressions
Digital impressions use a handheld scanner to capture a 3D image of your teeth. This process is faster and often more comfortable, particularly for patients with sensitive teeth or a strong gag reflex. Digital impressions can also reduce the risk of errors compared to traditional methods.
Why Impressions Are Important for Braces
Impressions serve as a foundation for designing braces that fit perfectly. Accurate molds help orthodontists:
- Assess tooth alignment and spacing.
- Plan the movement of teeth safely.
- Create customized brackets and wires.
- Monitor progress during treatment.
For patients with gum disease, impressions help identify areas where inflammation or receding gums may affect braces placement. Proper assessment reduces the risk of complications and ensures effective treatment.
The Typical Time for Taking Impressions
The time required to take impressions depends on the method used, the number of impressions needed, and the complexity of your dental structure.
Time for Traditional Impressions
Traditional impressions usually take between 10 and 20 minutes. The process includes the following steps:
Tray Selection: The orthodontist selects a tray that fits your dental arch comfortably.
Mixing the Material: Alginate or silicone is mixed to a smooth consistency.
Placing the Tray: The tray is pressed onto your teeth and held in place for 2–5 minutes until the material sets.
Removing the Tray: The hardened mold is carefully removed and inspected for accuracy.
Sometimes, a second impression is needed if the first one shows defects or bubbles. In such cases, the total time may extend by 5–10 minutes.
Time for Digital Impressions
Digital impressions generally take less time than traditional methods. The scanning process can last between 5 and 15 minutes, depending on the complexity of your teeth. Steps include:
Calibration: The scanner is prepared and calibrated.
Scanning: The orthodontist moves the scanner around your teeth to capture a complete 3D image.
Review: The digital model is checked for accuracy immediately.
Patients with sensitive teeth or a strong gag reflex often prefer digital impressions because they reduce discomfort.
Factors That Affect Impression Time
Oral Sensitivity
Patients with sensitive teeth may require extra care. The orthodontist may work more slowly or apply desensitizing gel to reduce discomfort. Sensitive teeth can prolong the impression process slightly but generally do not add more than a few minutes.
Gum Health
Gum disease, such as gingivitis or periodontitis, can complicate impressions. Swollen or bleeding gums may require the orthodontist to take additional steps to ensure an accurate mold. For example, they may gently retract the gums or use a soft impression material to minimize irritation.
Complex Dental Structure
Patients with crowded teeth, missing teeth, or complex bite issues may need longer sessions to capture every detail. Multiple impressions may be necessary for each arch to ensure precise modeling.
Patient Cooperation
Remaining still and following instructions is essential. Children or patients with anxiety may need more time, as pauses may be required to manage discomfort or gag reflexes.
Tips for a Comfortable Impression Experience
Inform Your Orthodontist
Let your orthodontist know if you have sensitive teeth or gum disease. They can adjust the technique or use a gentler material to minimize discomfort.
Relax Your Jaw
Tension can make impressions harder to take. Take deep breaths and try to keep your jaw relaxed. This reduces gagging and helps the material set properly.
Use Desensitizing Products
For patients with sensitive teeth, desensitizing toothpaste or gel can reduce discomfort during the impression process. Apply as directed by your dentist before your appointment.
Follow Oral Hygiene Instructions
Maintaining clean teeth and healthy gums makes impressions easier and more accurate. Brush and floss thoroughly before your appointment, and follow any pre-procedure instructions given by your orthodontist.
After the Impression is Taken
Once the impressions are complete, they are sent to a lab or processed digitally to create a model of your teeth. These models help in:
- Designing the braces.
- Customizing wires and brackets.
- Predicting tooth movement over time.
If any errors are detected, a repeat impression may be necessary. Accurate impressions are essential for effective braces treatment, particularly for patients with pre-existing gum issues or sensitive teeth.
Common Issues During Impressions
Gag Reflex
A strong gag reflex can interfere with traditional impressions. Using smaller trays, fast-setting materials, or digital scanning can help minimize this problem.
Material Tearing
Alginate or silicone can tear if removed too quickly or if bubbles form during setting. Orthodontists carefully remove trays to avoid damage and ensure a precise mold.
Discomfort in Sensitive Areas
Teeth with sensitivity may react to pressure or temperature changes during the impression. Gentle techniques and desensitizing treatments help reduce discomfort and prevent pain.
Frequency of Impressions During Treatment
Impressions are typically taken at the beginning of braces treatment. Additional impressions may be needed:
- For progress checks or adjustments.
- If a bracket or wire placement requires a refined model.
- When creating retainers after braces removal.
Overall, the number of impressions depends on the treatment plan and patient-specific factors, including gum health and dental complexity.
Conclusion
Dental impressions are a crucial part of braces treatment. They provide the precise details needed for accurate planning, especially for patients with sensitive teeth or gum disease. Traditional impressions usually take 10–20 minutes, while digital impressions can take 5–15 minutes. Factors such as oral sensitivity, gum health, and dental complexity can slightly extend the process. Following oral hygiene tips and communicating with your orthodontist can make the experience smoother and more comfortable. Understanding the impression process ensures that patients are prepared and can achieve the best outcomes for a healthy, aligned smile.